Decor clay polymer clay - master class
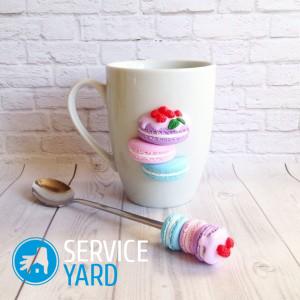
A new and rather original direction in the decoration of dishes and cutlery (spoons, knives, etc.) was the design of mugs using polymer clay. On the Internet you can find a huge number of video lessons on this design theme, following which you can make your own and unforgettably beautiful handmade decor, sculpting a mug with polymer clay. The master class of an experienced specialist will be useful not only for beginners, but also for lovers to craft and decorate something at home. Many people have already managed to learn how to use this technique of decorating their favorite cups with fancy and mouth-watering applications. You can make a New Year's gift for girls, mothers, men and boys. In this article, we will look at an example of the simplest lesson on how, in practice, decorating with polymer clay occurs at home.
to contents ↑Decorating dishes with polymer clay
Polymer clay is a fairly popular material. Despite its novelty, it is incredibly pliable and allows you to create unique decor items. Clay is ideal for creating jewelry, but not gold, of course, but those with which you can make your home more original, cozy and interesting.
Visiting a house in a design dominated by a large number of decorative trifles, by the type of original cups and napkins, there immediately arises a great desire to stay in it for as long as possible. Decorating a mug with polymer clay will cause a sea of emotions, especially for kids who love to help their parents in this matter.
to contents ↑Important! Clay itself is so plastic and diverse in terms of the color palette that you can do anything with it. It is of two types self-hardening and baking. It is better for beginners to give preference to clay that needs to be baked, otherwise they may simply not have time to give the product the desired shape.
Preparation for work
Now we will learn how to make simple applications using polymer clay. It is better to start with primitive options in order to study the entire process of manufacturing such parts as closely as possible.
For work you will need the following elements:
- Cup.
- Lacquer remover or specialized wiper.
- Clay for baking.
- Wooden skewers or toothpicks.
- Scissors.
- Clean damp cloth.
- Varnish for plastics.
- Stationery knife.
- Special glue.
Decor clay polymer clay - master class
The decor of mugs with polymer clay with your own hands is as follows:
- We take the mug and conveniently lay it on the work surface.
- Then, using a cotton swab moistened with nail polish remover or a wiper, carefully wipe the entire surface.
- We begin to make the application “from the head”. We take the beige clay, cut a small piece and roll it into a ball, make a neat round cake and stick it to the cup.
- Then we take red plastic, form a cake and use a pair of scissors to cut out the hat. We sculpt it on a ready-made head.
- Take a skewer or a toothpick. We draw dots and grooves on the hat to give it a knitted effect.
- Using white clay we make a small pea, divide it into two equal parts.We make two small cakes from them and glue them to the hat.
- We roll up a sausage from a small piece of black plastic and flatten it into a thin ribbon. We form eyebrows from them and cut off excess clay.
- From yellow clay we roll out a thin cake, cut out the beak with scissors.
- We make eyes out of two black peas, and with the help of a black tourniquet we form a beak border. Everything, our hat is decorated.
- We take black plastic and make a ball. We mold it into a mug and with a toothpick give it the shape of a pompom.
- We make eyes of two black peas.
- We take body clay, decorate and form a cake and attach it to the surface of the mug.
- We make shoes of gray clay that need to be thoroughly worked out with a skewer to give the sole the desired texture and make a stitch.
- We make two strips of blue clay, sculpt them on a mug at the very bottom of the body.
- We create lapels on jeans. We roll out blue mastic in a strip, cut off the desired piece, then sculpt it on our pants and use a toothpick to make the fabric textured.
- From green clay we roll out a figure resembling a vest, cut off all unnecessary details. We sculpt it on a mug.
- We roll up two sausages and form sleeves from them, which we then sculpt next to the already finished vest.
- We make a collar of green sausage, then we work out the whole jacket with a skewer so that it looks completely stitched outwardly.
- The jacket is on our idea two-sided, so you need to make the wrong side of the yellow clay. With the help of a thin yellow flagellum we make a fringing on the collar and a lock. Also, with the help of yellow stripes, we will make small lapels on the sleeves.
- The hat of our clay baby will have two knitted braids, which are best sculpted from red sausages, and then they must be beautifully decorated with a toothpick.
- Then we make handles of body clay and form a ball that we fasten in such a way that it seems that the baby is holding it in his hands.
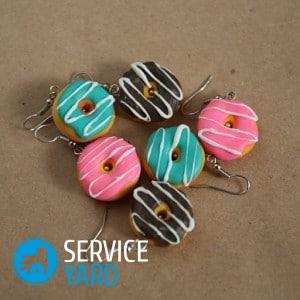
to contents ↑Important! If the process of such creativity is fascinating for you, be sure to read our detailed workshops on how to make polymer clay earrings.
Roasting - the rules
So, our application is ready, you need to send it for ten minutes to the oven, heated to 130 degrees. To do it right:
- According to the instructions, we prepare an epoxy adhesive that can withstand quite high temperatures.
- We take out the mug from the oven, wait until it cools completely.
- Then gently separate the application from the cup, mark the boundaries of its location with a felt-tip pen and apply a thin layer of glue.
- We press the application as tightly as possible to the mug. And with the help of matte varnish we completely cover the application with it, which will protect the surface from accidental damage.
Our wonderful little one is ready!
Important! Clay is an ideal material for a wide variety of works. Following our instructions on the link, you can even make whole polymer clay paintingsthat will surely please you and deliver aesthetic pleasure to your guests!
to contents ↑Stock footage
By the example of making such a wonderful and cute applique, we got acquainted with the basics of working with polymer clay. Using the same scheme, you can create a variety of applications and sculpt figures of cartoon characters. The work does not cause much difficulty, but it takes a lot of time, and the result is worth the effort. Even a child can decorate a mug with polymer clay, of course, he will have to help a little, because he can’t work with a hot oven and sharp scissors. This process will not only captivate the baby for a long time, but bring it closer to the parents. Do not refuse this pleasure to yourself or your precious child!
 (No ratings yet)