

DIY inscription on a circle

You do not like boring white cups, and would you like to decorate them? It is quite possible, and we will certainly help you with this. There are many different methods for decorating a cup beautifully for yourself and your family. The best gift is one that is made with your own hands, where the soul and the warmest feelings were invested. Therefore, if you have to congratulate someone, do not miss this option. Making the inscription on the mug with your own hands is not so difficult as it seems at first glance, but you need to take into account some of the nuances, which we will discuss later. In this article, we will share various ways, and you can easily apply any pattern to the surface of the cup.
to contents ↑We make drawings on glass - we paint glasses with our own hands
How to color patterns on cups? Having tried once to paint a glass yourself, you are so carried away by the process that it will be difficult to stop you! Each time you will get better and better, and the drawings will become even more interesting. The painted glass cup looks very cute with its own hands, each shape carries a certain meaning and possible words. Even the simplest glass can be turned into an incredible gift.
Important! First, practice painting your own mugs on a horizontal surface, so you can fill your hand and easily draw any image on a glass of various shapes.
Painting cups with baked paints
At the very beginning we prepare the necessary materials and tools:
- Glass cup
- Means for degreasing the surface (suitable detergent for washing dishes).
- Baked paints for glass and ceramics.
- Special contour for glass and ceramics.
- Brushes of different widths.
- Duct tape.
- Cotton swabs.
- Soft sponge.
We begin to create:
- To get started, select the desired pattern and transfer the sketch to paper. Examples of images can be taken in magazines, searched on the Internet, and even better come up on their own.
- Next - insert and fix the picture inside the glass, degrease the outer surface for drawing.
- Using the contour on the glass, apply the pattern to the surface of the glassware.
- After the contour has completely dried, we proceed to painting the bottom of the glass. Slightly dip the sponge in the baked paint, apply it lightly to the glass, achieving uniform staining. It is best to apply several layers of paint so that there are no gaps.
- Using a cotton swab moistened with water or alcohol, wipe off any unnecessary places that are touched by paint.
- At the next stage, we color the drawing, finishing the final touches.
- We are waiting for a few days, and after that - bake in the oven, following the instructions on the paint.
- When the image is baked, cool the glass until it cools completely.
- Now we stick the adhesive tape on the rim of the product and paint it with the same paint as the main picture. Various figures can be cut out of such a ribbon: stars, circles, hearts, and then stick them on a cup and cover, for example, with golden sparkles.
- All glued elements are fixed again with paint.
Glass painting with stained paints
The use of stained glass paints is the second way of drawing on glassware. Since they are transparent, you can use them to create a beautiful image that mimics a mosaic of colored glass.Such paints cannot be baked, so they can decorate dishes that are not used daily. Next, we will tell you how to paint a mug with your own hands in stained glass paints.
Important! The surface of such items can be coated with a special varnish to extend the life of the product. In any case, such painted glasses must be washed very carefully, without the use of detergents.
Glass glasses-candlesticks and electric lamps painted with stained-glass paints look unusual:
- Using a special glass contour, apply the selected image to a pre-cleaned surface.
- After the paint dries well, fill all parts of the drawing with stained-glass paints.
In the work you need to consider the following nuances:
- Make sure that each part of the fill pattern is small so that the paint does not spread.
- Do not try to cover all areas at once. As soon as one part of the drawing dries, start painting over the next.
- Hold the glass in a horizontal position, periodically turning in different directions until the paint cures. Only then can the next element be poured onto the glass.
to contents ↑Important! If you use stained glass paints on an organic basis, then work with them only in a well-ventilated area, as they have a strong smell and dry much more.
Spot painting of glasses and mugs
This method of decorating glasses is a little more complicated than the previous one, but you can deal with it. Such drawings on a mug with their own hands will look very original, since it is not a continuous drawing that is applied, but only fragments of it.
To work, you will need:
- Contour paints for glass and ceramics.
- Water-based acrylic paints (or marker for ceramics).
- Thin brush.
- Degreaser.
- Cotton pads for cleaning the surface.
- Cotton buds to correct the image.
Detailed master class:
- Degrease the surface of a glass or cup.
- We draw a sketch of the selected image or pattern with our own hands or print the picture on the printer.
- We test all the tubes of paint so that the paint is not too liquid and not too thick - it should be squeezed out easily enough, but not a continuous puddle.
- We train to put dots of different sizes on a piece of paper: small, medium and large diameter, given the force of pressing and the interval.
- As soon as you see that you have filled your hand and make points of the same size, then proceed directly to the drawing itself, given the indent from the edge of the cup about 2 cm.
- We fix the finished image. To do this, put the cup in the oven, heated to 150-170 °. Markers usually do not need to be baked - they just need to dry for one day.
Important! To beautifully decorate, make sure that the distance between the points is as uniform as possible.
Basic rules for spot painting cups:
- In order to stick a sketch on the back of the glass, use a transparent wide tape.
- If you draw on ceramic circles, then with the help of a sketch you can outline the contours and lines of the main drawing.
- You can use a ready-made stencil or template, or cut the figures with your own hands.
- It is very important to maintain the same distance between the points. Each point must be separate so that it does not turn out one solid line. Do not forget that the larger the diameter of the dots, the more spaces you can leave, and the smaller the dots, the less distance you need to withstand.
- First you need to put large dots on the main part of the picture, only after that draw all the other details.
to contents ↑Important! Thus, you can decorate glasses not only with dots, but also with peas, which can be painted with acrylics, using plastic from a simple pencil, a cotton swab or a brush. Decorating the bottom with a sticky decorative satin ribbon is as easy as decorating a mug with lace.To do this, glue a transparent double-sided tape on the cup, and decorate the material on top.
How to paint a mug with nail polish?
This is the easiest, fastest and most affordable way to apply a picture to a cup with your own hands. Such dishes will look autumn creative and stylish. Each girl at home has more than one nail polish, which simplifies the task.
For work, we take the following materials:
- Acetone.
- Cotton pads for surface treatment.
- Cotton buds for image correction.
- Nail polish in different colors (quantity optional).
- Any container with warm water (plastic or ceramic).
- Toothpick for stirring varnish in water.
- Napkins for cleaning.
The algorithm for applying the picture with nail polish:
- First of all, degrease the surface of the mug with acetone or alcohol.
- In a pre-prepared container with water, add varnish. If you want to make a light coating, you can add only a few drops of varnish, and for a more saturated color - more than 5 drops.
- After the first varnish, immediately add the following shades.
- Using a toothpick, stir all the shades of varnish in water.
- At the final stage, lower the mug into the container with homemade paint. As a result, we will see how the resulting solution will cover the surface of the cup with beautiful stains.
- If necessary, then correct the resulting image on the cup with nail polish remover and leave to dry for 2 hours.
That's all! Only 20 minutes, and the original decor is ready!
If you want, you can additionally paint the mug with acrylics or write a congratulation or a funny inscription. But note that such dishes cannot be used in the microwave.
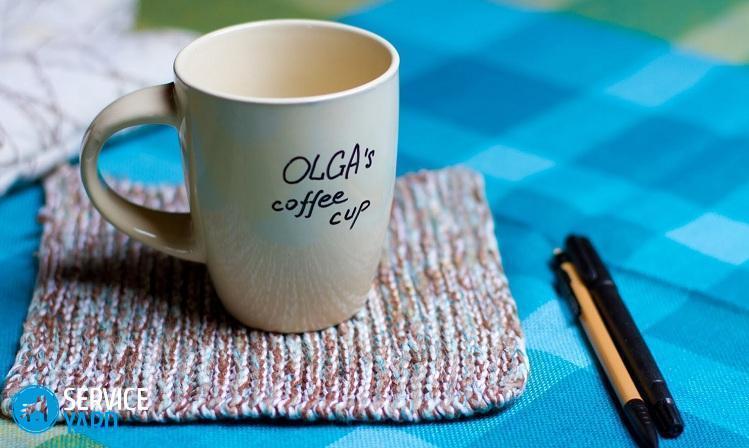
to contents ↑How to make the inscription on the circle marker?
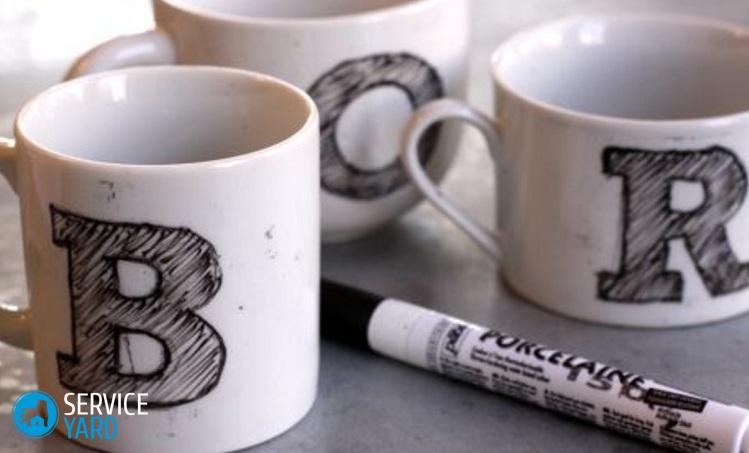
A single-toned cup can be original painted using a special marker. On it you can draw absolutely everything - from drawings to funny inscriptions. In our detailed master class, we will tell you how to transfer a ready-made template or create your own with your own hands.
What we need to prepare:
- 1 white porcelain mug.
- Thin black ceramic marker.
- Soft simple pencil.
- Scissors.
- Sticky thin tape.
- Wet wipes.
- A4 white paper.
- A printer.
We start to paint the cup:
- We take an inexpensive ceramic mug. Before inscribing the cup, thoroughly clean and dry its surface
- After the drawing is applied, you need to wait a day for the marker ink to completely dry.
- Now preheat the oven to 170 °, put a cup there and turn on the timer for about 30 minutes.
- As soon as time runs out, in no case take the cup out of the oven. Otherwise, the varnish may simply crack, and you will be disappointed with the result.
- When the oven has completely cooled down, carefully remove the painted cup from the oven.
- We check the resistance of the inscription with a wet cloth. If it is erased in places, then we heat it again in the same way.
- When the drawing is firmly baked on the cup, we can assume that we have finished our work.
Now it remains to enjoy the result!
to contents ↑Important! We do not recommend washing mugs with such patterns in the dishwasher. But if you selected the right material and withstood the technology of baking, then the inscription will remain after the automatic washing.
Stock footage
Today we told you how to beautifully decorate a mug using various simple methods: painting on glass, ceramics, decorating with individual elements. Now you will enjoy drinking your favorite coffee from an original cup made by yourself. We wish you success and inspiration!
- How to choose a vacuum cleaner taking into account the characteristics of the house and coatings?
- What to look for when choosing a water delivery
- How to quickly create comfort at home - tips for housewives
- How to choose the perfect TV - useful tips
- What to look for when choosing blinds
- What should be running shoes?
- What useful things can you buy in a hardware store
- Iphone 11 pro max review
- Than iPhone is better than Android smartphones
 (No ratings yet)