

DIY washbasin cabinet
In the process of transforming your own kitchen, you need to pay maximum attention to the design of the place where the sink is located, because no apartment and private house can do without this device. Original and multi-functional furniture for the sink will help to make the interior more stylish, because, in addition to its direct function, it can also serve as a place for storing detergents and other accessories. It’s not at all necessary to buy it in a store for a substantial amount of money - a cabinet for a kitchen sink with your own hands is going to be quite simple. Today we will offer you step-by-step instructions for the manufacture of such furniture, which will help you avoid problems in the process of its creation.
to contents ↑Varieties of modern kitchen cabinets with sink
Before you make a curbstone for a do-it-yourself sink, it will not be superfluous to consider possible variations, since such furniture today can have a variety of sizes, shapes, and can be made from both expensive and inexpensive materials. So, in order not to get confused, let's define the main criteria that you need to pay attention to.
Varieties of washbasins for a sink by type of structure:
- Direct. These are classic rectangular or square models that can be easily integrated into any work surface, in addition to corners. In addition, such furniture can be moved to a separate island.
Important! It can have shelves for storing dishes, drawers and even serve as a place to place built-in household appliances.
- Corner Such curbstones adjoin two walls of the room located perpendicular to each other. They can have a triangular, rectangular and L-shaped, occupy a minimum of space, are great for small rooms.
Important! Such curbstones have one big minus - for comfortable use they need to be equipped with additional devices in the form of carousels, brackets or drawers.
- Trapezoidal. These are the most capacious curbstones having one or several doors, compartments, at the same time they are equipped with a wide countertop. They allow you to build a large sink of any shape, inside to place many shelves.
As for the forms of the sinks themselves, much depends on the preferences of the customers. Models exist as follows:
- Oval.
- Square.
- Rectangular
- Round.
- Asymmetric.
Important! The most spacious are rectangular sinks, in which you can wash not only huge pots, but also large baking sheets.
For added convenience, sinks can be equipped with several compartments, wire racks, chopping boards, baskets, colanders, even appliances for chopping food waste.
to contents ↑Cabinet materials
For the manufacture of kitchen cabinets using chipboard, MDF, wood:
- The most budgetary material is chipboard, which has a large selection of colors. A major drawback of this material is the threat of life-threatening formaldehyde resins.
- MDF is the golden mean between quality and price. They make it from wood chips, paraffin, lignin. In its structure, it is denser than particleboard, does not evaporate harmful substances, we hold fasteners well.
- The array is expensive, can dry out or swell under the influence of hot air. It looks, of course, spectacularly due to the unique structure of the tree, but it is difficult to care for it.
Shell Materials
To make the whole set look organically in your kitchen and comfortable, you need to think about what material it is better to choose the sink itself from. Such variations are possible here.
Stainless steel
This is a classic material that has gained popularity due to its strength, durability, hygiene. You can choose a sink from it in economy or premium class - it all depends on the quality of the processing of seams and the thickness of the sheet.
It is worth noting that such sinks are unstable to scratches, they often form corrosion spots.
Important! Water strikes hard against the metal, which can cause some discomfort, but this disadvantage can be compensated for by the thickness or sound-absorbing lining.
Ceramics
Curbstones with ceramic sinks look incredibly beautiful and stylish, especially when they are placed near the windows, because the sun's rays, gleaming from the glossy surface of the sinks, give them a special elegance.
More often sinks are made of earthenware or porcelain. Such products do not need special care, it is enough to periodically clean them with ordinary detergents and warm water. They are completely safe, resistant to high temperatures, withstand enormous loads, do not wash out over time, do not fade. But it is necessary to clarify that they are quite fragile.
Fake diamond
The most accessible materials in this category are acrylic and liquid stone. Such sinks are made to order along with countertops. But to save money, you can make a mortise or overhead design.
to contents ↑Important! Shells made of artificial stone often crack, dents from boiling water form on them, they change color after contact with chemical and food colors.
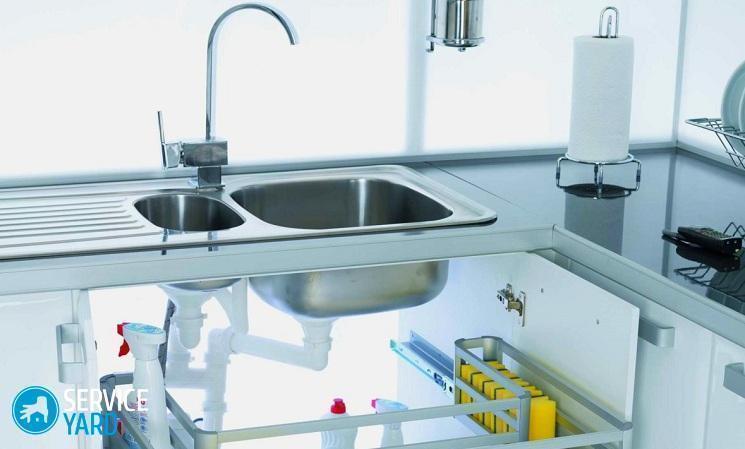
Installation options for kitchen cabinets under the sink
Depending on the material of manufacture and configuration, the cabinet under the do-it-yourself sink and the sink in it can be installed in several ways.
Each option has its own characteristics, which include the following:
- Overhead sinks. This is a classic way of arranging a straight pedestal and collapsible worktops. The lid is simply removed from the furniture, the place for the location of the sink over the edges is fixed.
Important! This option is considered the best for self-installation, even a beginner will cope with the installation and connection of communications.
- Mortise sinks. This option involves preparing a hole in the tabletop for the installation of a sink. To increase the level of tightness, all joints are sealed with a rubber sealant, and the seams are treated with two-component adhesive.
Important! With your own hands, you can mount such a model on a wooden countertop.
- Integrated sinks. They are a single unit with a countertop due to the perfect fit and tight fit. It is difficult to independently establish such a bowl, since only a person with special skills can achieve a monolithic surface. That is why basically they are made together with countertops to order.
to contents ↑Important! Monolithic models can vary greatly in installation price. Simple options are kept almost on the same glue, which is why they quickly break and cracks form on them. High-quality professional installation - the maximum match.
How to make your own cabinet under the sink?
We begin to make a cabinet for washing with our own hands by preparing all the necessary tools and materials, which include:
- Chipboard.
- Thick glass.
- Door hinges.
- Furniture corners.
- Putty.
- Self-tapping screws.
- Wood screws.
- Lacquer.
- Primer.
- Hacksaw or electric jigsaw.
- Double-sided tape.
- Hexagon.
- Screwdrivers.
- Sandpaper.
- Putty knife.
- Soft bristle brush.
- Pencil or marker.
- Glass cutter.
- Sand.
- Drill.
- Roulette and ruler.
- Grinding wheel.
- Protective gloves.
Make the cabinet under the sink according to the scheme:
- First of all, determine the size of the furniture, while taking into account the parameters of the sink itself, the height at which you want to install it, and the dimensions of the kitchen.
- Based on the data obtained, prepare a drawing of the cabinet under the sink, be sure to indicate in it what it will consist of, the dimensions of the sink and the height of its installation.
- Use a pencil to mark the chipboard.
- Cut out all the details.
- First of all, connect the bottom and walls with self-tapping screws. At the same time, make sure that the heads of the fasteners do not protrude strongly, they should be slightly recessed in the chipboard.
- Put the assembled cabinet against the wall, make sure that it stands level, does not stagger. To increase its rigidity, you should use furniture corners, it is better to arrange them with the help of short screws directly under the countertop.
- To make the surface of the cabinet perfectly smooth, putty it with a putty knife. Leave it to dry for a while, then sand it with sandpaper.
- Prime the entire surface of the product. This layer should be as thin as possible, then wait until it dries.
- Using a tint varnish and a brush, coat the structure in several layers.
- Place the cabinet under the sink.
- Make a glass door. Mark the glass first so that it takes on the desired shape. Use sand to make it dull. Just sprinkle it on the glass part and moisten it slightly. Put another piece of glass on top and rub the sand.
- Attach the finished door to the bedside table using the hinges, adjust it.
Stock footage
If you do everything clearly, following the instructions, then you will get a beautiful and original bedside table under the sink in the kitchen with your own hands. The main thing - before starting work, decide for yourself which sink design and bedside table shape are more suitable for your home so that the finished product fits well into the kitchen interior.
- How to choose a vacuum cleaner taking into account the characteristics of the house and coatings?
- What to look for when choosing a water delivery
- How to quickly create comfort at home - tips for housewives
- How to choose the perfect TV - useful tips
- What to look for when choosing blinds
- What should be running shoes?
- What useful things can you buy in a hardware store
- Iphone 11 pro max review
- Than iPhone is better than Android smartphones
 (No ratings yet)