

Kitchen faucet installation

Self-installation of the mixer in the kitchen is absolutely real. In most cases, you do not need to invite a wizard. Modern models of faucets are equipped with everything necessary for repair: fasteners, gaskets and, of course, detailed instructions. This article is a detailed guide for installing a kitchen faucet. You will also learn how to choose the right device so that it lasts you as long as possible.
to contents ↑Right choice questions
The first thing to decide is the location and method of installing the crane. If the kitchen is new, it is advisable that the faucet be included in the general kit, along with a sink. To choose the right plumbing for the kitchen, you need to consider such factors:
- Type and depth of the sink.
- Placing the drain.
- Placement and diameter of the hole for the mixer.
- The interval from the wall to the hole designed for the tap.
Features of various designs:
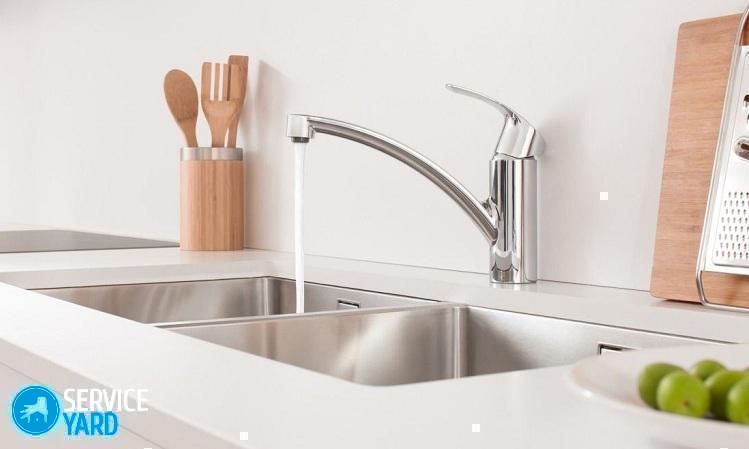
- The most convenient for modern kitchens are simple single-lever designs. The pressure and water temperature are controlled by one movement of the lever.
Important! The advantage of single lever structures is that they are unusually simple to maintain and operate.
- Two-fan models managed to become a kind of classic. They are equipped with 2 shut-off valves. Cold water is connected to one valve, hot water to another.
Important! Such models are rarely installed in the kitchen, only if the style of the room requires it. In addition, two-valve cranes are much more expensive than single-lever cranes.
- Touch faucets are technological innovations. Such products are produced in various dimensions and shapes. The solar cells mounted in the spout react to the movement of a person’s hand, the start-up of water is fully automated. Before starting operation, the device is programmed by setting indicators such as pressure force of the jet, temperature indicators. If you need to change the temperature, the device must be reprogrammed.
Important! The advantage of such a crane is a stylish “high-tech” look, ease of operation. But there is a drawback. The faucet runs on batteries, so there must always be spare parts for replacement. If the battery has run out and there is no spare element at hand, you cannot turn on the water supply.
Materials of manufacture
The cost of a kitchen faucet mainly depends on this factor:
- Inexpensive models are made of soft alloys (most often, it is silumin). They have a stylish, attractive design, but such devices cannot be called durable.
Important! Do not install a silumin structure in the kitchen, where you always have to use a faucet. The weakest link in silumin mixers is threaded connections. The material does not withstand loads and crumbles heavily. Maintainability of the product is almost zero. The only type of repair available is gasket replacement. All other parts cannot be repaired; the device must be completely replaced.
- Brass is a beautiful and durable alloy. Brass taps are very solid and practically do not fail. Only parts that are easy to replace break down: o-rings, membranes or gaskets break. The coating of brass products is aluminum, nickel or chrome (matte or glossy).
- If the sink is made of natural stone, faucets look beautiful, the coating of which imitates the stone from which the sink itself is made.Sometimes they use taps made of natural semi-precious stone. Naturally, the cost of these cranes is very high.
- For rooms with an exclusive design they use not very practical, but unusually pathos and stylish products - copper, bronze.
Dimensions
An important point when installing the mixer in the kitchen is the height and length of the spout:
- The ideal length of the spout is ½ the length of the bowl. The best option is when water enters the very center of the drain hole.
Important! The height of the spout (gander) is selected so that it is possible to put a high pan in the sink.
- But, at the same time, an excessively high gander is bad, because with a high height of falling water, a lot of spray is obtained.
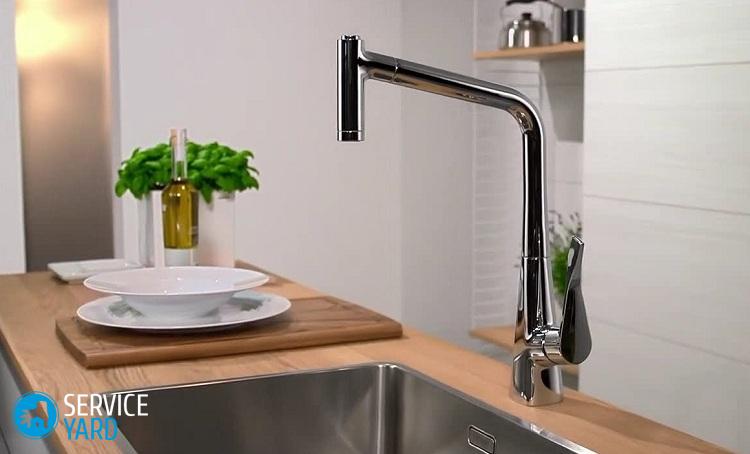
- A good solution is to install a crane with a retractable spout on a flexible hose.
to contents ↑Important! The angle of rotation of the spout depends on the type of sink. For a bowl mounted close to the wall, a rotation of 90 degrees is sufficient. For sinks consisting of two bowls, it is advisable to choose a spout that rotates 180 or 360 degrees. The convenience of the device and its functionality depend on this.
Installation of the tap in the kitchen
Check the completeness of the product you purchased. If you have chosen an inexpensive device, it is advisable to stock up with good-quality rubber parts and use them during installation. So more likely that you do not have to bother with the replacement of gaskets in a month.
Instruments
Before changing the faucet in the kitchen with your own hands, also prepare a set of tools and supplies:
- Adjustable wrench or set of wrenches.
- Pliers.
- Flat and Phillips screwdrivers.
- Electric drill with a nozzle - a torch for metal.
- FUM tape. It can be replaced with linen thread and sealant.
- Flexible hoses. They will be needed if the mixer is not equipped with an eyeliner.
- WD-40 or any analogue thereof. It is useful for untwisting a threaded connection, while retaining the thread.
- Rags.
- Cardboard.
Training:
- Lay out the disassembled mixer on the fabric, cover the floor with cardboard, as ceramic tiles may be damaged if metal parts fall.
- Before installing the faucet in the kitchen, turn off the water supply by turning the taps under the sink. Sometimes you have to block the riser completely.
- To completely get rid of the water in the pipes, open the tap and wait for the water to glass.
- To gently unscrew the old faucet, treat the joints with kerosene or WD-40 (depending on how strong the hose is, you have to wait 5 to 20 minutes). Unscrew the nuts, while applying force, it is impossible.
- Keep rags and a small bucket of water remaining in the tap ready. To remove the mixer from the mounting hole, unscrew the nut of the connecting pin. Then remove the mixer. As you can see, there is nothing complicated in removing the faucet from the sink.
- Clean the mounting hole from dirt and rust, try on a new tap first. If necessary, expand the hole for installing the crane with a metal cutter.
Installing the mixer in the sink:
- Slide the seal onto the threaded connection.
- Install the mixer into the hole with the threaded part.
- Put a rubber gasket on the installed tap from below.
- Tighten the lock nut using an adjustable wrench or pliers. Do not forget to check if the gasket has shifted. The position of the nut can be slightly corrected by loosening it.
- Connect the hoses to the installed mixer. As a rule, in a set there are 2 hoses for connection to cold and hot water supply. The hot water hose is specially marked. One hose has a short fitting and the other a long one. Installation of the mixer in the kitchen begins with a hose with a long fitting.
- Tighten the nut with a key, as they say, without fanaticism, so as to preserve the thread. Do not isolate the fittings and inlets. Enough factory seals.The main thing is not to tighten the nut too much, as the thread and gasket may be damaged.
- Fix the sink or sink on the countertop, then connect the hoses to the pipe, having previously cleaned and insulated the threaded pipe fittings. In this case, a sealing paste with linen thread or a sealing tape can be used. The second option is more convenient.
- Connect the hoses to the pipe, press the connection with an adjustable wrench. Adjust the clamp with medium force.
Stock footage
Doing replacing the faucet in the kitchen with your own hands is impractical if you purchased a very expensive device. In this case, it is better to use the services of a professional master.
- How to choose a vacuum cleaner taking into account the characteristics of the house and coatings?
- What to look for when choosing a water delivery
- How to quickly create comfort at home - tips for housewives
- How to choose the perfect TV - useful tips
- What to look for when choosing blinds
- What should be running shoes?
- What useful things can you buy in a hardware store
- Iphone 11 pro max review
- Than iPhone is better than Android smartphones
 (No ratings yet)