

Recessed hood installation
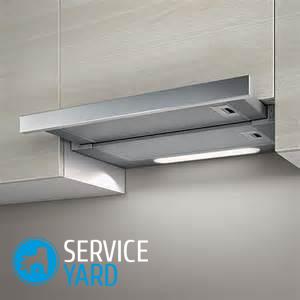
Probably there is no such person who would doubt the use of such a device as a cooker hood. The simple design filters the air, eliminates odors, grease and burning. Long gone are the days when the hood was a huge clumsy hood hanging over the stove. Modern exhaust hoods are compact, have a stylish design, and some are even mounted in hanging furniture. The topic of today's article is the installation of a built-in hood with your own hands.
to contents ↑Specificity
A hood for embedding is more expensive than a conventional appliance, but it has several advantages over it:
- Beautiful design, which not only does not spoil the interior, but also gives it style.
- Compact size, completely without sacrificing functionality and power.
Important! The size of the hood must exactly correspond to the dimensions of the box in which it will be installed. The box is not included in the kit, so you need to make sure that the dimensions match.
It is necessary to pay attention to the fact that the dimensions of the dome (depth and width) are not less than the dimensions of the plate. If you do not take this into account, smoke and tar will remain indoors.
to contents ↑Classification
There are 2 types of built-in hoods:
- Channelless (circulating).
- With duct (duct type).
to contents ↑Important! The devices of the channelless type operate with the same volume of air mass. They simply filter the air, so during installation there is no need to worry about arranging the exit to the outside. Channel-type devices are more desirable for installation, which contribute to the removal of exhaust air outside the premises and replacing it with fresh.
Installing the integrated hood - the main stages of work
Before you install the built-in hood, you need to plan the work, dividing it into several stages:
- Marking mounts.
- Arrangement of mounting holes.
- Installing the hood.
- Duct mount
- Connect the device to the network.
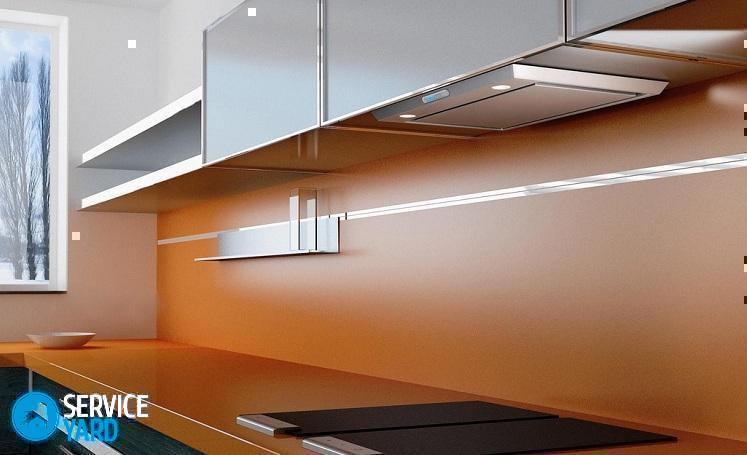
How to integrate the hood into the cabinet with your own hands?
So, you have purchased a suitable exhaust hood for the kitchen. How to mount it in hanging furniture? The most crucial step is choosing the optimal height above the stove.
Important! The distance above the stove should not be too large (otherwise, the suction efficiency will suffer). At the same time, the hostess should be comfortable so that she does not hit her head behind a hanging cabinet.
Recommended distances by specialists:
- For electric stoves - 600-800 mm, the optimal distance is 750 mm.
- For gas stoves - 650-800 mm, the optimal interval is 750 mm.
The drawback of many suction devices is the cord is too short, so most likely you will need a separate outlet located near the device. Naturally, the cord needs to be kept away from the working surface of the plate. The ground wires are connected exactly with the circuit.
Important! Consider the location of the duct so that the number of corners and turns from the appliance to the exhaust outlet is minimal.
Installation process
After the preparatory phase has been completed, the turn has come for arranging the mounting hole in the hanging furniture. You can not cut the hole, but simply remove the lower part.
A hole for the duct is cut in the upper wall of the cabinet, taking into account the shape.In order not to “loosen” the cabinet, fasten it from the inside with small corners.
There are two ways to install the built-in hood into the cabinet:
- Pre-fix the appliance in furniture, then hang the cabinet on the wall.
- Independent fastening of furniture and exhaust device.
Here are the tips to consider when doing the job:
- As fasteners use self-tapping screws and dowels.
- If gas supply pipes interfere with the tight installation of the hood on the wall, use long threaded studs. In this case, the device will be installed from the wall at a certain distance.
- If the cabinet is equipped with a shelf, then it is advisable to fix the hood on it. An additional hole for the duct will be required. You can make a fume hood with your own hands.
- If the appliance is equipped with a pull-out panel, be sure to make sure that the details of the hanging furniture do not interfere with its free movement. If there is an obstacle, the furniture is slightly adjusted under the hood (for example, the edge of the door is cut a bit).
- Connect the duct to the housing so that you can, if necessary, dismantle the structure and clean the blockages. At the same time, tightness is a prerequisite. This can be achieved using silicone sealant.
- The best shape of the duct, metal or plastic is rectangular. But the corrugated duct in the installation is simpler. It is stretched as much as possible to minimize creases.
- The outlet is equipped with a valve to avoid back draft. In order not to spoil the interior, you can remove the corrugated pipe inside the box. The disadvantage of a corrugated duct is the noise during the operation of the hood. This lack of modern plastic designs with a smooth surface.
Popular bugs
The mistake of many home masters is the direction of the duct into the opening of a common house ventilation shaft. This cannot be done for the following reasons:
- The kitchen is devoid of ventilation when the hood is off. You have to either constantly keep the device turned on or the window open. Both that, and another are inconvenient.
- Risk of dust blowing back and odors through the ventilation shaft. In order for the hood to work well, it is necessary that the common house ventilation channel be immaculately clean, and this happens infrequently.
to contents ↑Important! The best option is to remove the hole into the street.
Stock footage
Now you know how to install the built-in hood. And the given instruction will help to put theoretical knowledge into practice.
- How to choose a vacuum cleaner taking into account the characteristics of the house and coatings?
- What to look for when choosing a water delivery
- How to quickly create comfort at home - tips for housewives
- How to choose the perfect TV - useful tips
- What to look for when choosing blinds
- What should be running shoes?
- What useful things can you buy in a hardware store
- Iphone 11 pro max review
- Than iPhone is better than Android smartphones
 (No ratings yet)