

Liquid glass for the floor
In recent years, bulk floors have become increasingly popular. Many apartment owners refuse traditional boards, parquet, linoleum and even laminate in favor of glass or rubber, and are very happy with it. Even the name “glass floor” does not scare anyone away. This is not about fragile and dangerous material, but about something completely different. What is liquid glass for the floor? Read about it in our article.
to contents ↑Why exactly liquid glass?
Strictly speaking, what floors in apartments and public buildings now cover is not really glass. That is, the material consists of the same chemical elements as the transparent sheets that are inserted into the window frames, but its structure is completely different. Such a surface does not break, you can not cut hands and feet against sharp edges, and in general liquid glass for the floor in the apartment is a wonderful coating that has a whole range of extremely useful qualities:
- it is an excellent water repellent that does not get wet and does not dissolve - it repels water, like ordinary glass;
- bacteria on such a surface practically multiply, that is, the floor has some antiseptic properties;
- a static charge does not appear, respectively - the floor can be considered antistatic;
- such a coating increases the density of the floor, since it fills all the recesses and gaps that always exist on the base;
- it doesn’t burn, and that is why this coating is often used in schools, kindergartens and hospitals;
- you can safely spill anything from sunflower oil to “Mole” onto such a surface - there will be no effect, because aggressive acids and alkalis do not act on liquid glass.
Due to all these properties, liquid glass is used not only for floors in internal rooms, but also in other places;
- to obtain paints resistant to fire and aggressive substances;
- for the production of water-repellent finishing materials;
- to improve cement - such additives increase strength and abrasion resistance;
- applied to foundations to protect them from moisture and mold;
- It is used to protect facades from adverse weather conditions.
Cooking principle
Despite the fact that in stores of dry building mixes there are a lot of similar compositions, liquid glass on the floor can be prepared by yourself. To do this, you will need:
- construction mixer;
- sand;
- fine filler;
- silica;
- water.
You can connect in different proportions, depending on what properties you need. After all substances are in one container, the contents of the tank are thoroughly mixed for 3-5 minutes. Then the actual liquid glass is added there, and is still mixed again. As a result, you should get a homogeneous mixture with mobility from 2 to 4 cm.
Solidification time
After what time does liquid glass solidify for screed or other purposes? This entirely depends on the ratio of components, or rather, the amount of liquid glass proper in the mixture:
- if the glass content is 1%, then the setting time is from an hour and a quarter to three and a half;
- 2% of the composition hardens from an hour to three;
- 35 minutes is enough for a 5% solution, the maximum hardening time is two and a half hours.
Liquid glass for concrete floor
How to cover the floor with liquid glass? There are several general considerations to consider, regardless of composition:
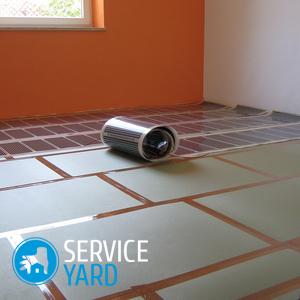
- The base is the same as for any other floor - that is, waterproofing, thermal insulation, and screed are needed.
- The screed is marked - parallel lines are drawn (if the eye is good - this can not be done).
- Starting from the wall, in equal portions, the composition is poured onto the floor.
- Liquid glass is evenly distributed over the entire surface wide.
What tools are needed?
Work with bare hands is inconvenient and ineffective. Of course, we need tools. In order to evenly apply the solution, at hand should be:
- wide spatula;
- long-handled squeegee;
- needle roller.
When you take up a specific job, you will need other tools, but without the above liquid glass simply can not be poured:
- The spatula serves to disperse the solution over the surface more or less evenly. Since you have to process large areas, then the tool should be large.
- A roller with needles removes bubbles and irregularities - for this the entire surface is rolled.
- The squeegee is done finishing rolling, the floor should turn out as even as possible. The layer thickness is from 3 to 5 cm.
to contents ↑Important! It is necessary to calculate your time so that you can fill the floor in the room at one time, while you need to work quickly to use up all the prepared composition in an hour.
Make the floor
Now that you know the general principles of preparing the composition and working with it, you can try. In order to make a floor of liquid glass with your own hands from beginning to end, you will need not only tools with which the mixture is applied to the surface and leveled. You need a lot:
- large capacity for solution;
- two rollers - needle, with which the mixture is leveled, and the usual paint;
- paint brush;
- if there is no construction mixer, a drill with a nozzle for mixing solutions is suitable - it costs much less;
- spatula 1.5 m long;
- level;
- polyurethane varnish;
- primer;
- ready mix for liquid floors or components.
We repair the floor
After making sure that everything you need is at your fingertips and don’t have to run to the store at the very height of work, we proceed. Covering a concrete floor with liquid glass or another mixture (for example, rubber - the technology is almost the same) is the last step, and before that you have something else to do:
- Remove the old coating completely - this must be done, because the liquid floor is thin and transparent, so that it does not hide any bumps or spots.
- Remove the screed.
- Remove the trash.
- Tidy up the subfloor - level it and lay down the soil.
- Allow the subfloor to dry.
- Make a waterproofing, for which roofing material or even a regular wide plastic film is used. .
- Make a new concrete screed - without it you will not be able to level the floor so that you can put a high-quality modern coating. The screed is mounted using beacons, which are placed on plaster cones and level.
- Allow the screed to harden - in many cases a day is enough for you to proceed to the next stage.
- Remove the beacons.
- Close the holes.
- Remove the steel profile so that it does not rust.
- The finish coating can only be poured after the screed has completely hardened, that is, it takes about a month to do this.
Important! To prevent the screed from cracking, the first week it is covered with polyethylene, and then regularly moistened.
Choose a cover
Waiting is a rather unpleasant thing. However, during this time you can run around to construction stores and read what Internet trading offers, because there are a lot of mixes for filling the floor.
They are divided into two types:
- mineral;
- polymer.
The most popular are polymer blends. By looking at the directories, you can easily see that they are different too:
- epoxy;
- epoxy-urethane.
Important! Why are epoxy mixtures interesting? The fact that they withstand a large load, and the owners of rooms with high humidity are very fond of epoxy-urethane. Such compositions are mainly used in public buildings. But the owners of residential premises usually like mineral mixtures - they are cheaper, they don’t smell so much, they give the quality of coverage, which is quite enough for an ordinary apartment.
The mixture itself
Mixtures of the same type are also different. Some of them are called basic, others - finishing. Liquid floor coverings, which belong to the basic group, perfectly conceal irregularities up to 8 cm, which greatly facilitates the work with the screed.
There are bulk floors of the middle group. The recess of 8 cm for such, perhaps, will be a little too big, but with differences of 3 cm, you will be able to cope with them without any problems. Finally, the finishes are the most delicate. The height difference should not be more than 1 cm.
After the screed has dried
The month passed quickly, you managed to choose what you want, and even buy the right composition. It's time to start finishing your floor:
- There is no way without a primer, so the first thing we do is apply it to the screed, because there are always small cracks on concrete, and the primer helps to deal with them without any problems.
- If the walls near the floor are not pasted, we paste over.
- We read the instructions again (you probably did it when you bought the mixture, but you need to refresh your memory so as not to mix anything up).
- Mark the floor.
- We dilute the mixture - do not forget that it should be enough for the whole room.
- Quickly and quickly throw it in strips and level it so that it does not begin to harden.
- We are waiting for everything to dry completely and completely - this usually takes about three days.
- We cover all this with a protective varnish.
Important! If the handle of the squeegee is too short, you will have to walk around the room, for which it is necessary to have shoes with spikes (sold in stores selling special clothing).
Decorative floors
Making a bulk decorative floor is not much different from ordinary pouring. The only difference is that it turns out not two layers, as usual, but three:
- main;
- decorative;
- finishing.
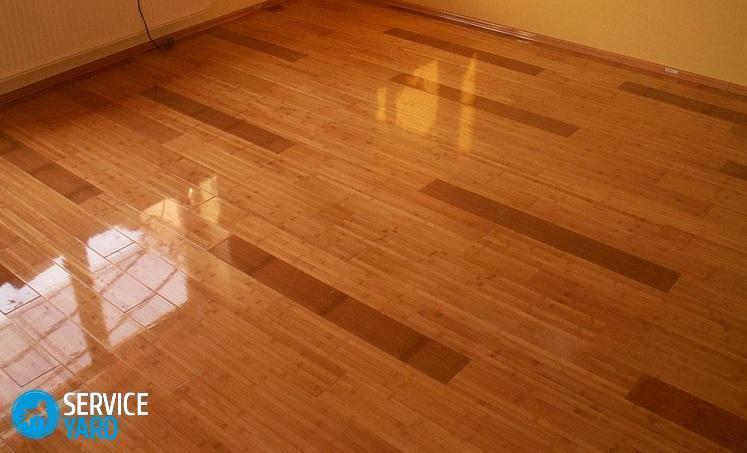
to contents ↑Important! For the decorative layer, you can apply a variety of materials - from ready-made mixtures to plain paper, from which elements of the ornament are cut. An interesting solution is a 3D effect that can visually change the geometry of your room (although you must be very careful when choosing a picture when it comes to flooring).
Two words about liquid rubber
For bulk floors, not only liquid glass is used, but also special rubber. Such coverage can also be laid on the street, which is often used when equipping sports or playgrounds. To produce this material, rubber crumb is used, which is painted with special dyes and diluted with polyurethane adhesive. To apply this coating, you need a special spray gun.
The advantages of this gender are obvious:
- stacked on any foundation - it can be not only concrete, but metal, ceramics, asphalt and much more, if only the platform was smooth;
- keeps well not only on the floor, but also on the walls (this may seem especially interesting if you decide to make a playground in the country next to the house or fence);
- serves 10-15 years (in this it is inferior to glass, which is almost eternal).
to contents ↑Important! The most serious drawback of a rubber bulk floor is its price. It will cost more than liquid glass and other rubber surfaces. In addition, the sprayer is also an expensive thing, and it hardly makes sense to buy it at once. Therefore, most often it is used for arrangement of public areas.
Stock footage
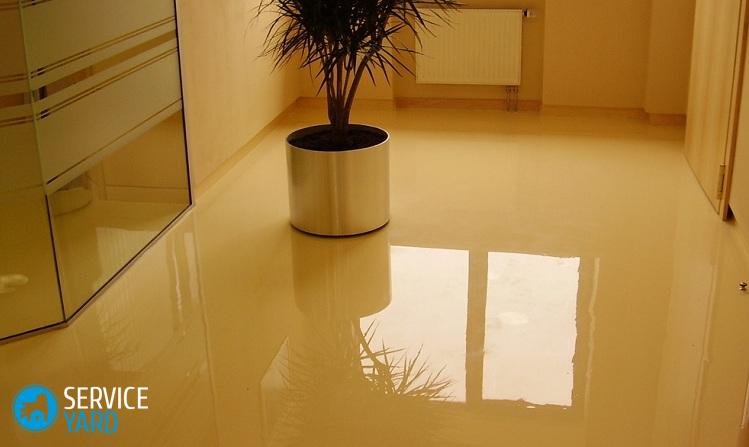
Self-leveling floors are a great opportunity to create a spectacular interior that will serve as much as you want. True, bulk floors have a significant drawback - it is almost impossible to dismantle them, so you will have to lay down a new one at the next repair.But its layer is small, so there will not be much influence on the height of the room, and it will not happen soon.
- How to choose a vacuum cleaner taking into account the characteristics of the house and coatings?
- What to look for when choosing a water delivery
- How to quickly create comfort at home - tips for housewives
- How to choose the perfect TV - useful tips
- What to look for when choosing blinds
- What should be running shoes?
- What useful things can you buy in a hardware store
- Iphone 11 pro max review
- Than iPhone is better than Android smartphones
 (No ratings yet)